BBQ Broiler Pan Method | Guest Post by Brian Hoffman
I have a guest post for everyone today! One of my cooking pals, Brian Hoffman, keeps in touch with me from time to time to talk about grilling, BBQ and outdoor cooking in general. He was telling me about his broiler pan technique and I talked him into sharing it with us. Just goes to show you how using simple items you already may have can produce great result to an everyday grill recipe.
Thank you Brian!
BBQ Broiler Pan Method
Author: Brian Hoffman
Have you ever seen a broiler pan that ends up in the bottom drawer of the kitchen stove from lack of use?
For a good part of the time, a broiler pan sees its usual course of action in the indoor kitchen, but what about the great outdoors?
Used with outdoor grills, broiler pans can provide unique results that a standard type of cast iron or porcelain-on-steel fire grate is not able to match precisely.
With a combination of direct and indirect heating, the deflection of a broiler pan brings something to the grilling process in the sense that the heat is deflected slightly and is then convected within the grill, cooking a piece of meat (or other grilled entree) differently than traditional grilling methods and similarly to today's indoor kitchen ranges that run on natural or propane gas.
The key here is the combination of direct and indirect heating.
I use an offset-flue wood (or charcoal) cooker which I custom built myself. This means that the inlet air rises from the bottom-left side of the cooker body, then upward, and travels to the right across the cooking area (by a natural draw). This movement of air is essential to the offset-flue process.
Within the cooker, the firebox is on the left with an empty cavity on the right providing the direct and indirect heating zones.
The cooker has a welded angle-iron frame to suspend the broiler pan above the fire so that it can be easily moved from the left to the right (direct to indirect heat).
To prepare your grilling item for cooking, coat the broiler pan with olive oil to prevent sticking and center the meat on the pan, placing it over the zone of direct heat.
I have found that this method provides a “cross-buck” sear and a pleasant consistency, to be completed with the indirect heating on the right.
Temperature is key. 250-325 degrees. No more. The broiler pan, though perforated, has more “surface area” and can overheat at temperatures over 325 degrees (possibly burning the main course awaited by your guests or causing the pan to warp). A clearance of 2-1/2”-3” between the pan and fire is a good measure for maintaining proper heat distribution. A stainless steel broiler pan is preferred, as an enamel-on-steel pan may fracture in the higher temperature of a wood or charcoal fire. Careful attention is required when moving the broiler pan from the direct heating zone to the indirect heating zone which ensures proper cooking balance. The required time for shifting the item from direct to indirect heat depends on personal preference of “doneness” and practice.
For cooker fuel, I prefer to use hard wood species (cut and split type) and sometimes charcoal. These substances burn at a higher temperature than that of a typical gas-fueled grill.
The cooking characteristics of the broiler pan also benefits foil-wrapped items such as baked potatoes and onions (halved or whole). These have worked out quite well thus far.
In the process of cooking with a broiler pan, the secret is the closed-hood method. It is important to frequently check the progress of the “masterpiece” for heat balance. Make sure that your grill's temperature gauge works accurately. Two essentials for cooking anything properly is the right temperature and correct duration on the fire.
These findings have been through trial and error.
Thank you for your time.
Brian followed up the previous info with an update:
Hello.
Well, here is the follow up pictures of the “BBQ broiler pan method” article. Wanted to try a give a complete thought here.
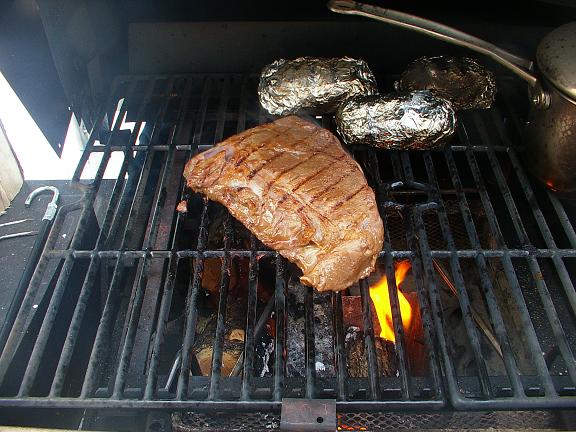
The entree is a London broil (2 pounds). With a meat marinade (in the plastic zip lock bag) in the fridge for about 15 hours.
About 2 minutes. (each side.)
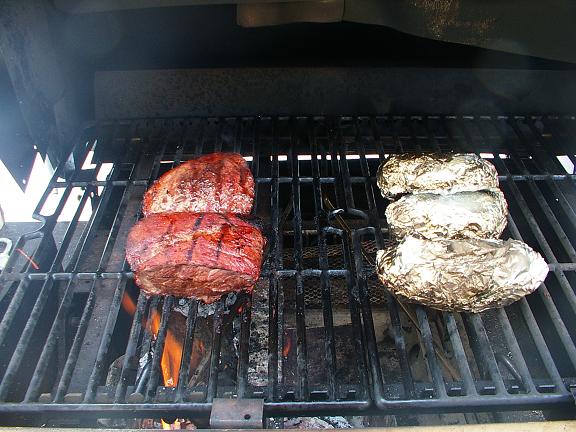
About 1- 1/2 hours in this step. Moved the broiler pan from the indirect zone on the right to the (more) direct heat zone on the left.
Note: brought the entree into the house (cut, and tasted) little bit too rare. back to the fire outside….
Sear # 3
15 minutes more, just about right.
What I had found out in today's BBQ session is that the longer the entree (cuts of beef ,particularly steak) is on the broiler pan, the more tender that it becomes. From what I can see, the shape and construction of the broiler pan on the grill kind of captures a “high-end” type (preparation) of entree that the fancy restaurants sometimes offer.
I did not discover this until this afternoon, that the final sear actually adds a distinctive detail to the taste on the plate at the table.
My guests were pleased.*
* my own family. Now that is cool !!
Wood fired on apple hardwood.
25 degrees outside today. (snow on the ground…)
Outdoor BBQ is an all year type outside activity !
Hope that this presentation is helpful and informative.
Thanks for your time.
Brian Hoffman


