
How to Grill a Perfect Holiday Turkey Video
Here is my newest video “How to Grill a Perfect Holiday Turkey”
(Closed Captioning available on this video)
Video Transcript:
Presenter:
Are you having trouble with your holiday turkey on the grill, coming out a little dry, little tough, maybe even undercooked?
Well, today, I’m going to show you how to do it right on the Cooking Everything Outdoors show.
Announcer:
Gary House with the outdoor cook Cooking Everything Outdoors show, I hope you try this at home.
Presenter:
In order to make perfect turkey, we need to make perfect gravy to go with it.
Can’t have it without it, right?
So what I want to do first is I have preheated up my Bull Barbecue 4-Burner Stainless Steel Grill.
And I put in a roast pan that I am preheating.
And what we are going to do is we are going to start making short stock.
And it’s going to make the most incredible flavor you’ve ever had.
We are going to be using a Bull Barbecue 4-Burner Stainless Steel Grill to make and grill our turkey in.
The first thing I did is I preheated it.
It’s right at about 400–excuse me–about 380 degrees.
Almost 400 degrees.
I put a roasting pan inside.
I’m preheating that up because I need a hot surface because I’m going to be caramelizing about almost 2 pounds of chicken pieces.
And this is basically thighs and some legs and turkey neck that I have chopped into pieces.
I also have my mirepoix which is 1 large carrot, 1 stock of celery–sorry–and then 1 large onion that I have chopped up.
I also have 4 tablespoons of olive oil.
What I’m going to be doing is I’m going to be taking this and I’m going to be caramelizing it or caramelizing it in the grill.
That’s the first step to making phenomenal gravy.
So let’s get this short stock going.
4 tablespoons of olive oil.
Almost 2 pounds of cut-up chicken pieces.
And our mirepoix.
Let’s get this stirred up really quick.
Going to let this roast for several minutes, depending on the temperature of your barbecue, you’re going to keep an eye on it but we’re browning all of it, tenderizing those vegetables.
We have been caramelizing our chicken and mirepoix for about 20 minutes now.
Almost 400 degrees is roughly where it’s been.
You’ve got to see this, it’s beautiful.
So we are already getting a lot of nice brown bits on the bottom of our roasting pan.
And if you did this in the stainless steel pan you’d get even more.
But this is where we want it.
We don’t want it completely cooked.
But we want the chicken brown, so they are starting to release a lot of these flavors.
And we needed to glaze this.
And what I have here is a cup of dry white wine.
And that’s just basically going to help us get a lot of those brown pieces on the bottom of the roasting pan, called sucks.
We are going to get those up.
And that’s going to add even more flavor to our gravy.
Okay.
So I want to get my pieces off to the side here as much as possible.
I have a roasting rack that I’m going to be using for my turkey.
I’m going to place that right in the center.
Now, I am going to add 4 cups of stock.
This is homemade chicken stock that I made.
You can use the canned stuff that if you’d like, but certainly homemade is very easy and it taste really, really good.
And there we go.
That’s going to stop everything from burning now.
I’m going to add a tremendous amount of flavor to this.
So we are going to leave that in there and heat for a little bit longer and we’re going to work on the turkey now.
Simple.
One of the things that we’re going to be doing with our turkey is we are going to be adding basically flavored butter to the surface of the turkey.
And it’s going to go under the skin and on top of the skin and it’s going to make it pulp.
So what I have here is 2 sticks of softened butter.
I have about 2 teaspoons of fresh thyme.
A teaspoon of fresh ground black pepper.
And a little bit of salt, maybe 1/2 a teaspoon.
I’m going to save some of this pepper and see how this looks before I put it all in there.
So it’s softened butter.
And this is what we are going to put under our skin.
And I think that’s just about right.
This is going to add a lot of extra flavor.
And it’s going to help keep that breast meat moist.
Okay, it’s time to talk about the turkey.
I have here a 15 pound–this is actually a butterball turkey that I brined overnight.
And the brining solution was water, at 6 quarts of water.
1 and 1/2 cups of kosher salt.
About a bunch of thyme that I chopped up.
And a whole onion that I sliced up.
That’s just the basic brining solution.
So one of the things that I did with my turkey is I loosened up the skin on top of the breast.
The reason for that is we’re going to get a little messy right now.
And I’m going to start putting some of this butter, basically about a third to a half of this softened butter.
What you got to do it is going to be stuffed under the skin and that is just going to add all this incredible flavor to the turkey breast, keep it moist and you’re going to have fun getting messy.
Just get it up in there as much as you can get up in there.
It’s not for the squeamish.
But it’s well worth taking the time to do this.
As for presentation value it’s not going to add a lot on the inside.
But I have seen people put leaves and fancy designs and patterns on top of their turkey.
And that looks pretty cool, if you want to go to that length to do that.
So our butter is under the skin.
Going to add that flavor and moisture to the breast of the turkey.
And now we need to actually do the rest of the seasoning.
So tuck your wings underneath, your turkey breast.
Let’s get them out of the way.
We’re going to take a little bit of olive oil–or not olive oil, but vegetable oil.
And I’m going to coat the outside of the turkey.
Going to get a little messy again.
This is going to help moisturize the skin and going to add to the browning of the turkey.
Make it look really nice.
So once we have done that–that was about 1 tablespoon of vegetable oil–we need to put some aromatics in the turkey.
Now, it’s not technically stuffing.
If you want to have stuffing, I highly recommend you do it separately.
But we are going to apply some salt and a pepper to the inside of our turkey and just sprinkle it around in there.
That’s about 1/2 a teaspoon of fresh ground black pepper and kosher, 1/2 a teaspoon of kosher salt.
So we are going to start stuffing it here.
I have a whole onion, quartered.
1 carrot.
And on the carrot–actually I peeled it to get it ready.
Now, you can leave the peel on I think because you’re not going to really be eating what’s in the turkey.
But some people think that the skin of the carrot is a little bitter during the cooking process.
1/2 a head of whole garlic.
Shove that in there.
Have about 6 sprigs of thyme.
And just going to get those in the cavity as well.
And 3 small bay leaves.
I’m going to get those in there.
We have our short stock in the bottom of our roasting pan.
I have a roast rack in my roasting pan.
My prepared turkey.
Now, you’re probably thinking we’re just going to put this turkey right on the rack and throw it in there for 4 hours and it’s going to be done.
That’s not the way we’re going to do this.
The first thing I’m going to do is I’m going to put a little bit of aluminum foil in here.
And this is really hot, so be careful.
And I am going to puncture couple holes so that my turkey drippings can get in to the juices.
Now, I’m going to take the turkey, very carefully lift it up.
And I’m going to flip it over.
I want it breast side down.
Okay.
We’re going to cook it this way for 1 hour.
It’s going to take about 4 hours to cook this turkey.
We got 4 more steps to go, then we get to make the gravy.
So our first hour is up.
First hour is where the turkey is upside down.
And what we’re going to do is, very carefully, going to flip it back over because we’re going to have it for the first hour.
Now, this is somewhat of a challenge to do this.
So I’m going to take some towels that I have.
I’m going to get a good grip on the turkey and carefully flip it over.
There’s going to be a lot of fluid under the skin from the butter and such.
So you’re going to make sure you don’t spill any of that on you.
And I don’t think there is any really good way of doing this, but we just want to get this out and gently flip it over without causing us physical damage.
Okay.
Now, trust me that was the most difficult part of this whole recipe.
So now, what I want to do is I want to put and melt some butter over the top of my turkey here.
This is our flavored butter.
Try to get all of it nicely coated and going to start browning this.
And making it look absolutely beautiful.
Like so.
Okay, one more hour, 350 degrees.
Hour number 2 is over.
Let’s check it out.
Oh, yeah.
Boy, look at that.
It’s starting to brown up nicely.
Got a lot of great juices down in there for our stock.
If that, by chance, starts drying out on you, don’t be afraid to add a little bit more chicken stock or even add some water.
You can add some wine to it.
Let’s give this another butter baste.
And get all of that flavor and seasoning on there.
Save enough your flavored butter here for another coating in about an hour.
That’s it.
Okay, if it starts getting too dark for you or too brown, then you want to put some foil over it.
And we’re going to let this go another hour, probably about another 45 minutes.
Then I’m going to start doing some temperature testing to make sure that we’re at the right temp for this thing.
We’re getting close.
Okay, we’re about 4 and 1/2 hours into this, but lost my light.
So, big surprise.
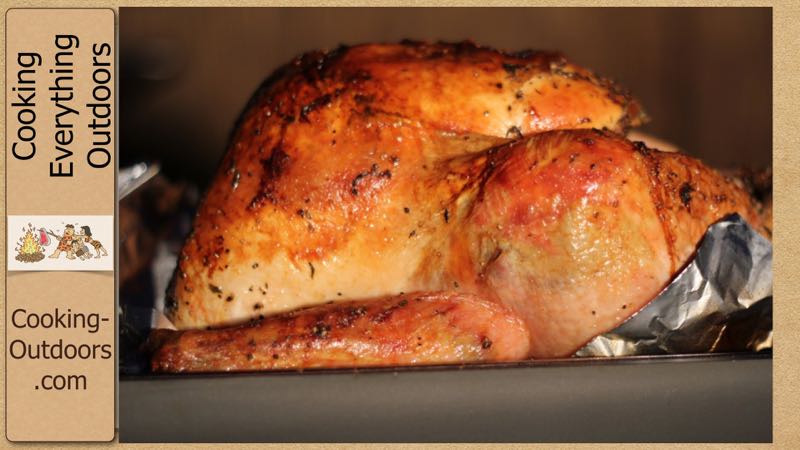
So let’s take a look at this.
I did foil it up a little ways and do it.
And it just looks absolutely magnificent.
I need to get it off the heat or shut this bad boy down.
And we’ll take a look at this.
Okay, completely lost my light.
It’s been sitting for about 20 minutes, it’s really just about ready to give a carb and I know you can’t see for beams here.
So basically the whole concept was brining the turkey and then seasoned it with aromatics and butter.
I cooked it for about 4 and 1/2 hours for a 15 pound turkey.
Waited until the internal temperature was at least 165 by the thigh meat down there in the drum stick.
And now I have this beautiful roasted turkey that you’re not going to be able to see and the aromatics have all dripped down into the bottom of this roasting pan.
And that’s what I’m going to use to make gravy which I’ll show you hopefully in the next video.
I don’t know if we can get a shot of this, but let’s try cutting a piece of this turkey breast off and see how we did here.
Look at that juice.
Look at how juicy that is.
I just love that.
Just fantastic!
Couple of a little bit of the bone there.
Okay.
Oh, my God.
That is moist and it’s tender.
Flavorful.
It’s really good.
Okay, give this a try.
I want to take a second to thank my sponsors, Camp Chef at www.OutdoorCooking.com, Island Grillstone.
You can find me in the show just about everywhere.
I’m on iTunes, on YouTube, Facebook, Pinterest, Twitter, iFood.tv.
I always forget all of them, but I’m there.
And also, I want to let everybody know that I’m part of the Tastemade Network on YouTube now which is very, very exciting.
And if you get a chance, subscribe or leave a comment to this video.
I’d really appreciate to hear your thoughts and comments.
Anyway, this is Gary House Cooking Everything Outdoors.
And I’m done for the night.
