
Hey everyone, just wanted to give you a quick update on the Outdoor Kitchen project!
I had to bring in some help for the project seeings how I am still a bit limited on what I can do in this area. As I shared previously, my oldest son (living at home) was a huge help in digging out all of the dirt for the concrete pad and I managed to scoop a few shovel fulls myself … kinda. You can check that part of the project here: http://www.cooking-outdoors.com/the-new-cooking-outdoors-kitchen-update-number-1/
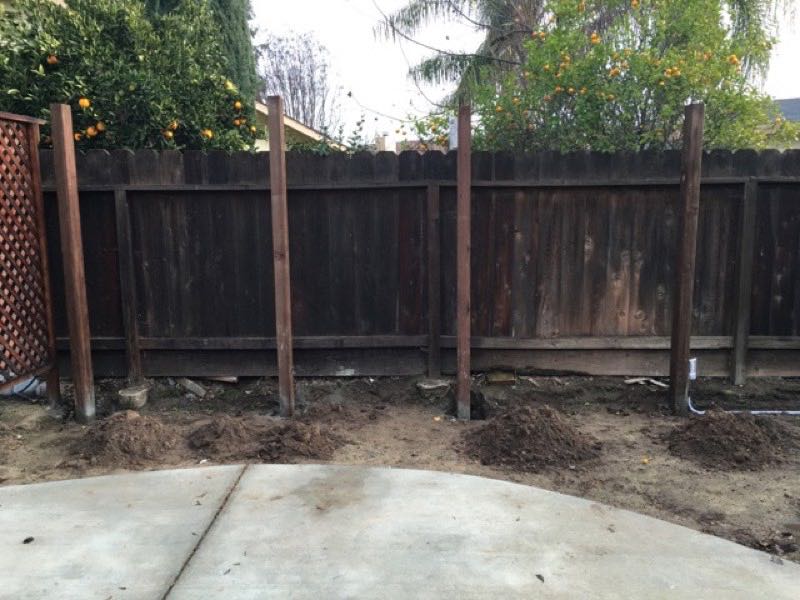
Once the weather cleared up a bit, the four 10′ x 4″ x 6″ post were set.
Then I ran some power to the post so I can wire-in some lights, outlets and perhaps a TV.
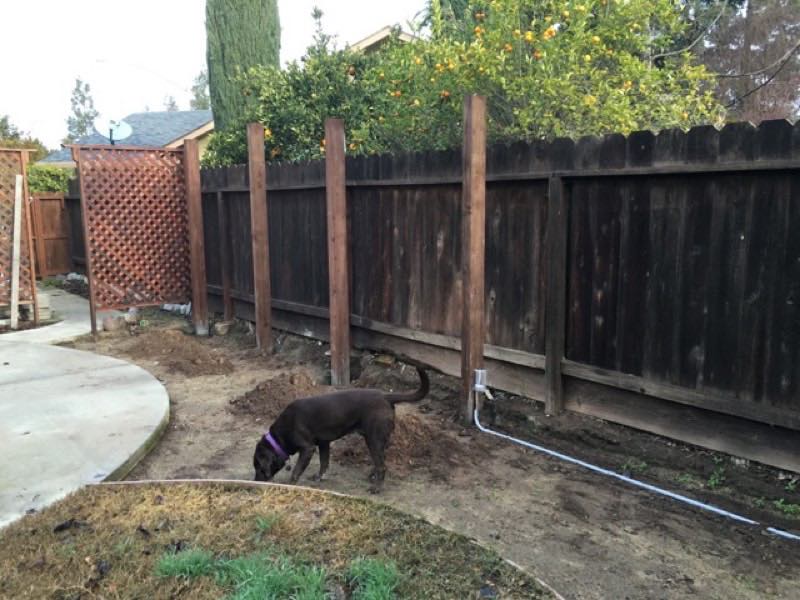
Of course Bailey was involved every step of the way!
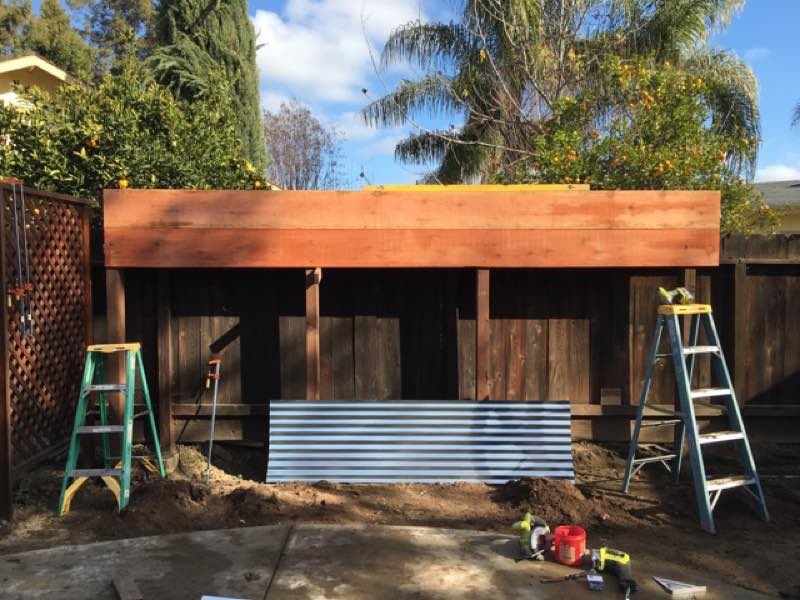
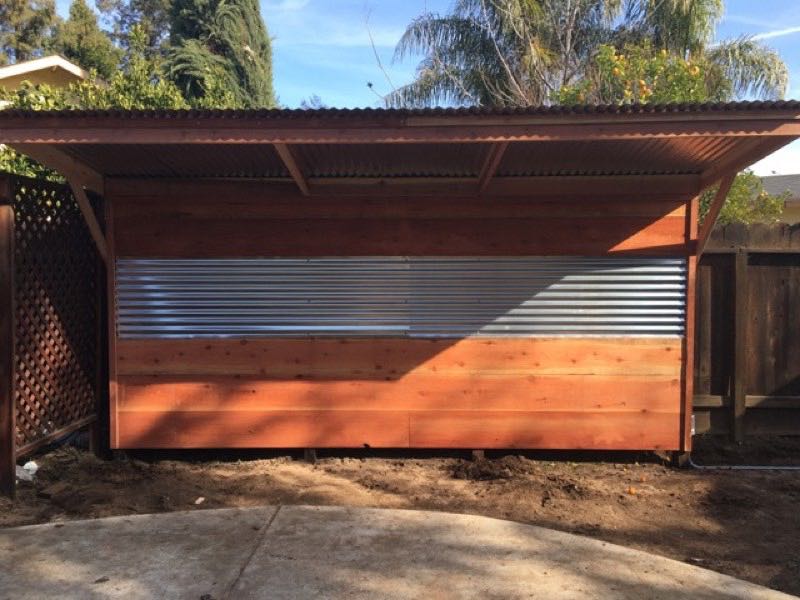
Once the posts had set, the top plate was put on, then we started attaching the wall boards to complete the back wall.
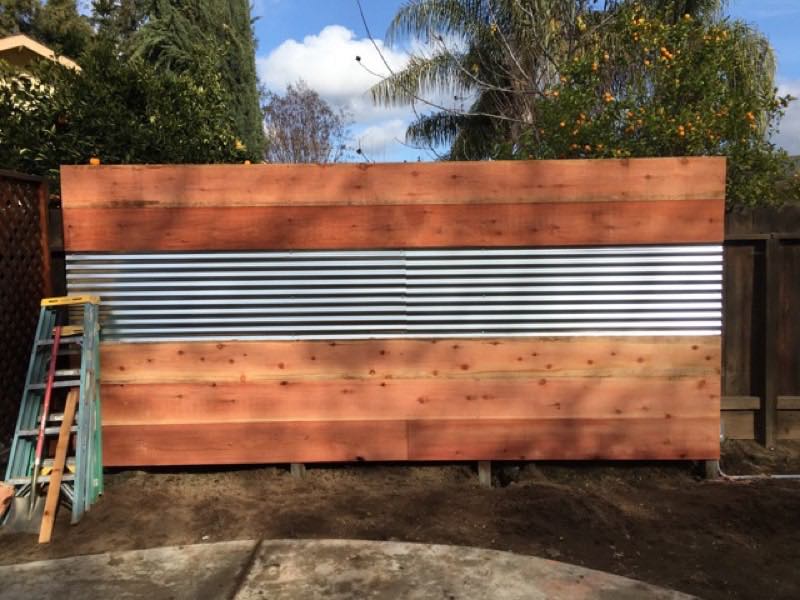
Then the corrugated panels and a few more wall boards!
The overall width of the back is 16′.
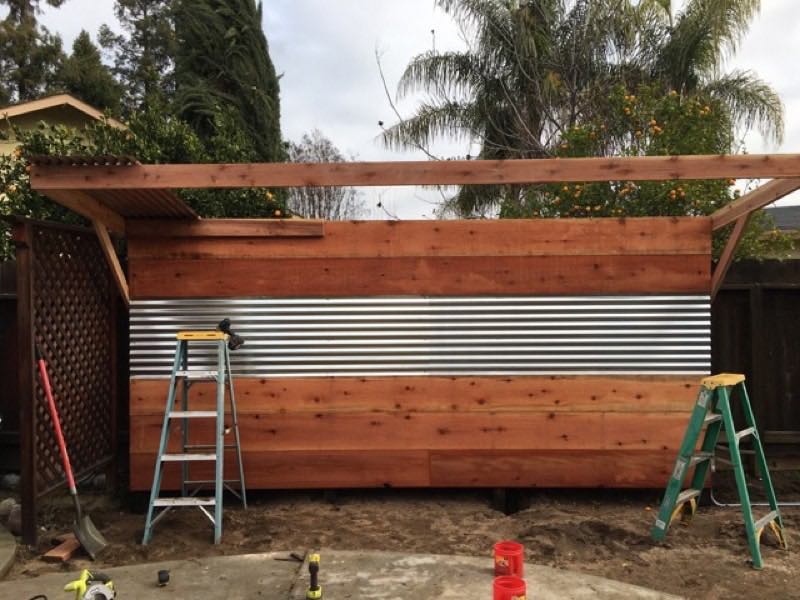
Then it was time to start working on the 6′ extension to cover my receded hairline – I mean the grills!

Overall I am very happy with our progress so far!
I still need to do my wiring and some additional trim work but that can wait until the concrete pad goes in.
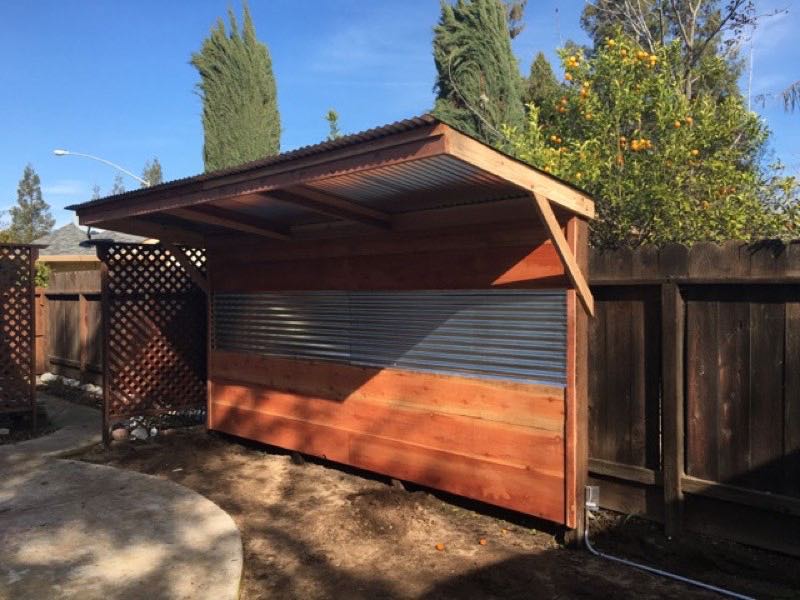
When everything is finished I can start building the actual outdoor kitchen!
Dutch oven table, gas and charcoal grills, ceramic grill, refrigerator, storage drawers and hopefully a outdoor pizza oven!