
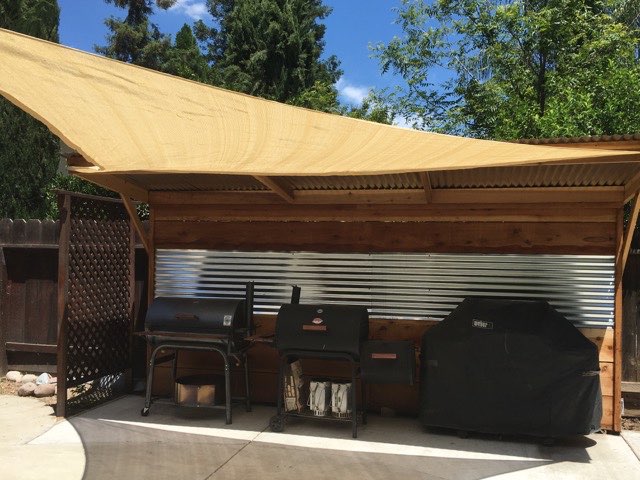
Well it's been a few months since I last shared the outdoor kitchen build with all of you. I am almost halfway finished with my vision and that's a loose estimate because I am constantly adding more things I want to have in the final design. Still trying to figure out what I want to do for lighting, shooting video and the cabinets surface material.
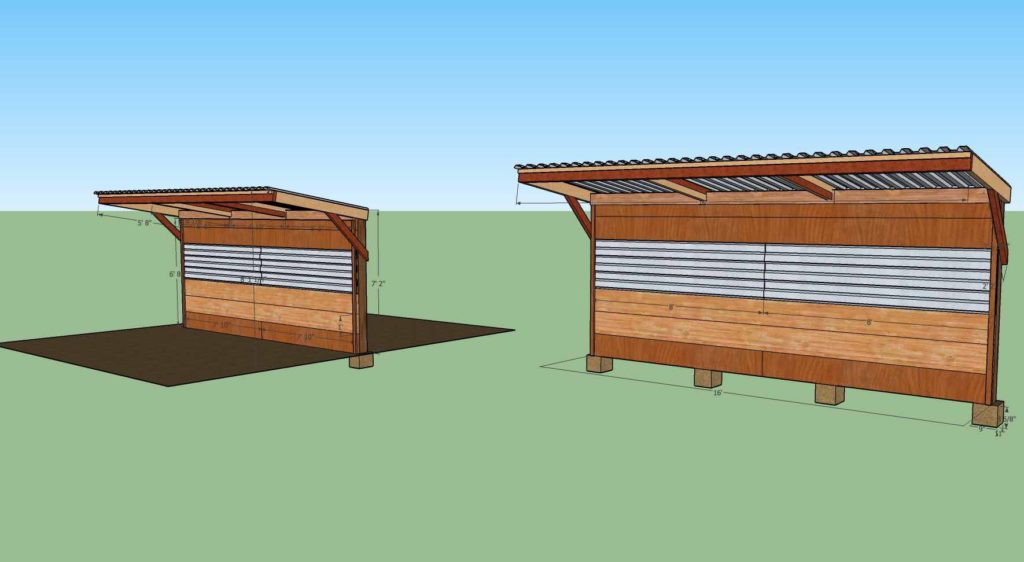
(Note: the above measurements are rough guidelines only)
I have been asked a few times from readers about the size of the outdoor kitchen back wall and if I could supply a material list – yes, absolutely!
Cooking-Outdoors Outdoor Kitchen Materials List
Width: 16′
Height: 7′ 2″ rear – 8″ front
Awning Extension: 5′
Material list:
Back wall
4 – 4″ x 6″ 10′ pressure treated posts
8 bags – fence post concrete
5 – 1″ x 12″ x 16′ redwood boards ( I used 4 plus 2 – 8′ boards )
1 – 2″ x 6″ x 16′ redwood board (top rail)
2 – 26″ x 8′ galvanized corrugated panels
2 – 1″ x 2″ x 8′ redwood trim
1 – 2″ x 6″ x6′ center panel back brace
Awning
4 – 2″ x 6″ x 60″ rafters
3 – 2″ x 6″ spacers cut to fit for between the rafters
1 – 2″ x 6″ x 16″ front cap
2 – 2″ x 4″ x 42″ redwood angle braces
8 – 26″ x 6′ galvanized corrugated panels
2 – 1″ x 2″ x 8′ redwood trim
Note: post are sunk into ground approximately 32″ with a 4″ pad poured on top of that.
We also poured 3 cubic yards of concrete to form the patio section of the outdoor kitchen, filling in the dirt area that had been there for too many years. I can't find the words to tell you how happy I was to see this done! Of course helping haul 20 or so wheelbarrows full of concrete a few months after having a heart attack wasn't the best decision I could have made.
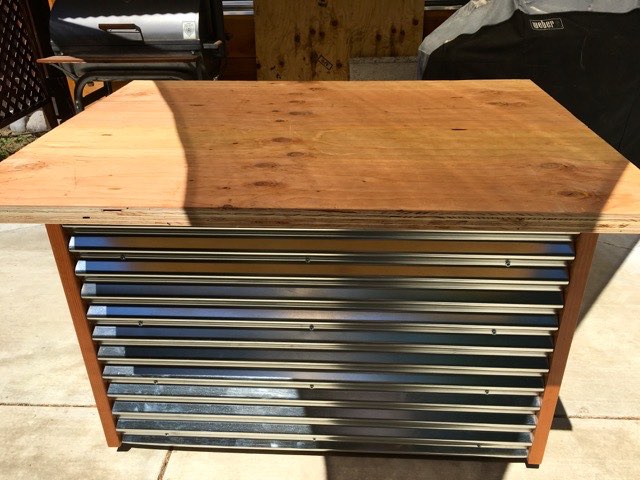
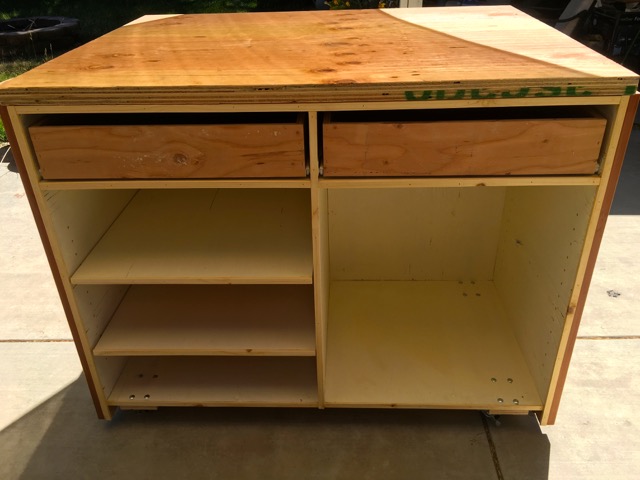
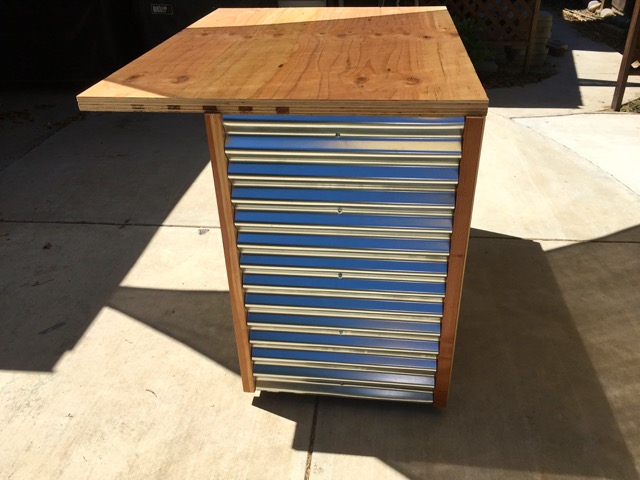
Outdoor Kitchen Island
-
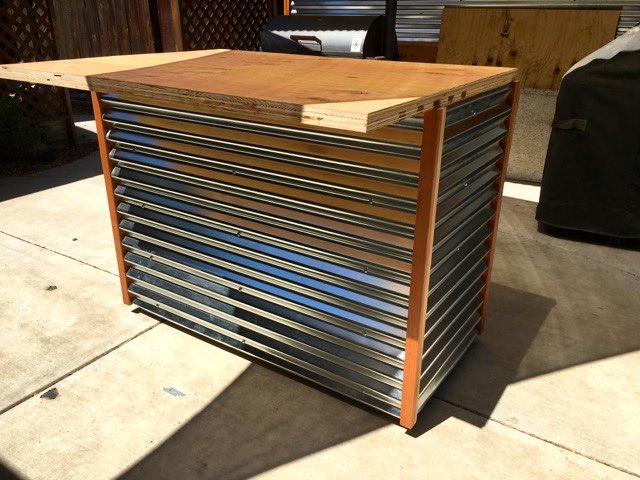
- Outdoor Kitchen Island
-
- Front view
-
- Chef side view
-
- Side view
Since the last update I have been slowly building my Outdoor Kitchen Island. It is tall enough for us to use as we sit for a quick bite to eat and large enough for me to do a full meal prep as I cook. Two drawers, two shelves and room for a refrigerator if I choose to install one. I plan to finish the top off with tile and redwood bar rails around the edge as trim.
What do I need to do next?
1. Strip all the back wall off the outdoor kitchen to finish up the electrical wiring (T.V., outlets, lights, etc.).
2. Stain the outdoor kitchen structure while the wood is off.
3. Re- install the walls, trim, etc and make sure the gaps tightened up.
4. Make a decision on the grills to install. This will be a new purchase and might take until next year to save up the money unless I can find a grill sponsor for the project. I plan to add a propane and charcoal grill, side by side, to the kitchen.
The vision here is to have, from left to right, Dutch oven table, charcoal grill, propane grill, ceramic cooker and finally a outdoor oven. There will be room for a few drawers, cabinets and such. The outdoor oven will basically be a pizza oven but large enough to cook whatever I desire and the plan is, at this point, to build it myself but that can always change.
Well that's it for now!
Gary
Previous Outdoor Kitchen Updates:
The New Cooking Outdoors Kitchen – Update Number 1
The New Cooking Outdoors Kitchen – Update Number 2